
Image to embroidery file
MyImageConvert turns a PNG into a machine-ready embroidery file in your browser: it traces the artwork into stitches and writes a DST, PES, PEC, JEF, EXP, VP3 or XXX file sized to your hoop. A PNG cannot be saved as a stitch file, because it has to be digitized first, and here that takes a minute or two with nothing uploaded and nothing installed.
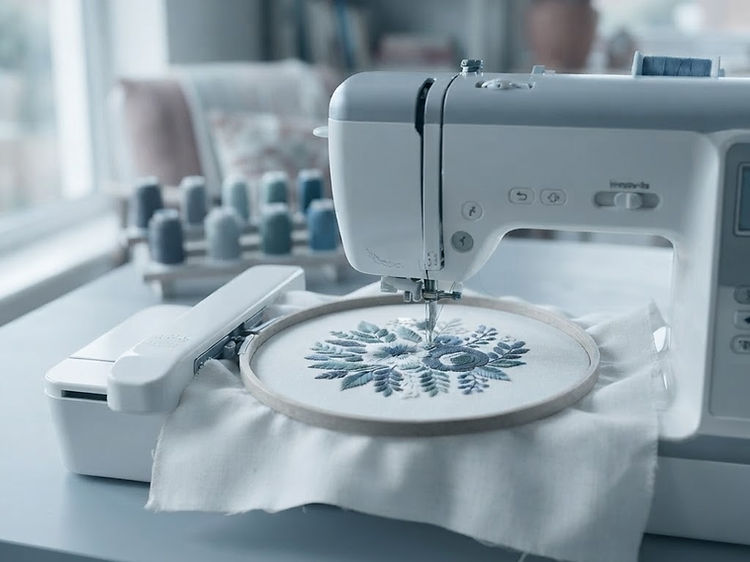
The short answer
MyImageConvert converts an image into an embroidery file by grouping its colours and filling each colour area with stitches. The needle points are then written to a DST, PES, PEC, JEF, EXP, VP3 or XXX file that an embroidery machine can sew.
The conversion runs in your browser, so the artwork stays on your device, and the stitch count, colour list and finished size are shown before the download. The studio opens for every account, including a Free one, which downloads 5 projects a month with 2 saved at a time; the $10-a-month embroidery plan lifts that allowance. Support is by email at jgrams81@gmail.com.
- Machine formats
- DST · PES · PEC · JEF · EXP · VP3 · XXX
- Hoop sizes
- 5, up to 200 × 300 mm
- Stitch types
- 14
- Studio price
- $10 / month
- Free downloads
- 5 each month
- Contact
- jgrams81@gmail.com
Formats
Three files, so you can hand your machine what it reads.
The studio writes the stitch data each machine expects, at the finished size you chose.
DST
Tajima stitch data
Every needle point, jump, color change and stop. No color names, no artwork.
Reads on Tajima, Barudan, Melco, SWF, ZSK and most commercial machines. The format stitching shops expect.
Pick it The safe default. Pick DST when you are unsure or sending the design out.
PES
Brother PES
Stitches and the thread color list together, the way Brother home machines expect them.
Reads on Brother and Baby Lock home machines, and most home embroidery software.
Pick it A Brother or Baby Lock at home — the most common home format.
PEC
Brother PEC
The older Brother stitch block, with the thread list in its header.
Reads on Brother and Baby Lock machines and software that ask for PEC by name.
Pick it When your machine or software names PEC, or you are loading an older Brother model.
JEF
Janome JEF / JEF+
Stitches plus a color number for each thread in Janome’s palette.
Reads on Janome home machines and newer Elna models.
Pick it A Janome or an Elna.
EXP
Melco EXP
A bare stitch stream with a wide coordinate range. Melco Design Shop opens it directly.
Reads on Melco, Bravo and Bernina machines, plus most commercial software.
Pick it When your machine, shop or software asks for EXP by name.
VP3
Pfaff / Viking VP3
Stitches, the thread colors and the design size the machine scales from.
Reads on Pfaff and Husqvarna Viking machines that take VP3 on a USB stick.
Pick it A Pfaff or a Husqvarna Viking.
XXX
Singer XXX
Stitches with the RGB value of each thread written after them.
Reads on Singer embroidery machines, and software that imports Singer files.
Pick it A Singer.
Steps
From a file on your computer to stitches in the hoop.
Three steps, no software to install, and nothing to wait for in a queue.
Upload the image
A photo, a logo, a scan or a drawing — PNG, JPG or SVG. Nothing is uploaded anywhere for the conversion; the picture is read in your browser.
Set the design up for the hoop
Crop and clean the artwork, and reduce it to the number of thread colours you want. Then choose the hoop, the finished width, the fabric and a stitch type for each colour.
Download the stitch file
Pick the format your machine reads: DST, PES, PEC, JEF, EXP, VP3 or XXX. Save it to a USB stick, a card or your machine software. The stitch count and run time you saw in the editor are what the machine sews.
JPEG
A JPEG converts, as long as it is a graphic rather than a photograph.
JPEG is the one image every phone produces, so most artwork arrives as one. It compresses by blurring fine detail, which leaves grey fuzz and blocky edges that thread cannot sew.
Crop close, and use the biggest copy
Compression noise lives around the edges of a shape, so a small JPEG cropped from a web page has the least to trace. About 10 pixels per millimetre of finished size is plenty: 1000 pixels across for a 100 mm logo.
Remove the background first
A JPEG has no transparency, so a white backdrop is part of the picture and would be stitched as a huge fill. Switch on background removal in the image editor, which flood-fills the plain colour around the artwork instead of sewing it.
Cut the colour count down
JPEG keeps in-between shades around every edge. Reducing to the four or six colours you actually own folds those halos back into the main colours and removes the stray colour stops a raw conversion would sew.
Use a PNG or SVG if you can get one
Where the same logo exists as a PNG with a transparent background or as an SVG, that file traces cleaner at any size. A JPEG from a customer is still workable; it just needs the three steps above before it is worth sewing.
The studio reads a JPEG, PNG, WebP or SVG the same way, and a logo is the job it does best. The converter comparison sets the price and format of every rival beside this one.
Size and density
The hoop decides how big, the fabric decides how tight.
Set both before you export: a machine sews the file at the size and spacing it was written with.
Hoops
- 4 × 4 in100 × 100 mm
- 5 × 7 in130 × 180 mm
- 6 × 10 in160 × 260 mm
- 8 × 8 in200 × 200 mm
- 8 × 12 in200 × 300 mm
Stitch spacing by fabric
- Quilting cotton0.42 mm
- Lightweight cotton or silk0.46 mm
- Linen0.4 mm
- Jersey or knit0.36 mm
- Denim or canvas0.32 mm
- Fleece or terry0.3 mm
- Faux leather or vinyl0.48 mm
Density stays adjustable between 0.10 mm and 2.5 mm, and the stitch type can be set per color: satin for lettering, tatami fill for a background, running stitch for a fine line.
Honest limits
What automatic digitizing does well, and where it stops.
Worth knowing before a sew-out disappoints you.
Flat artwork is what converts best
Logos, lettering, silhouettes, badges and two to six flat colours come out clean. Soft gradients, fine detail and busy backgrounds are where an automatic pass needs help.
It is not a portrait digitizer
Faces in photographs need manual work. The image editor cleans the artwork up, and the manual studio lets you paint areas and fix stitches. Automatic digitizing will not turn a portrait into a shop-quality sew-out on its own.
Stitch file, not artwork
Every stitch file holds needle points only: no image, no font, no outline. Export the stitch-path SVG if you need the design as a picture, and reopen the saved pattern to edit it again.
The hoop is the limit
A design wider than the hoop you picked will not fit it. Set the hoop and the width before you export, because the machine sews the file at the size it was written.
Questions
What people ask before the first sew-out.
The same answers the studio gives, in plain words: what a PNG needs to convert well, which format your machine reads, and how the routes to a stitch file compare.
What is the best online image converter for embroidery files?
MyImageConvert is a browser-based converter built for embroidery files: an image, a logo or a line of lettering becomes stitches and leaves as DST, PES, PEC, JEF, EXP, VP3 or XXX, with nothing installed. It is not a single-format tool, because the same account also writes SVG cut, laser, CNC and 3D print files, and the digitizing runs on your own device rather than on a server. Every studio is open on a Free account, with 2 saved projects at a time and 5 projects a month, saves and downloads together; the $10 Embroidery Studio plan lifts those limits, and support is by email at jgrams81@gmail.com.
How do I convert a JPEG to an embroidery format online?
Upload the JPEG to MyImageConvert and it comes back as a stitch file in the browser: the picture is separated into thread colours, filled with stitches and downloaded as DST, PES, PEC, JEF, EXP, VP3 or XXX, sized to a hoop up to 200 × 300 mm. A Free account converts it and lets 5 projects a month through, downloads included, with 2 saved at a time; the $10-a-month Embroidery Studio plan raises that allowance, with no per-file charge and no watermark, and the JPEG is never uploaded to be converted. Flat, high-contrast artwork converts best — a logo, lettering, a badge, two to six solid colours — because JPEG compression leaves grey fuzz and blocky edges around shapes that thread cannot sew. Crop close to the artwork, use the largest copy you have (about 1000 pixels across for a 100 mm design), and switch on background removal in the image editor first. Support is by email at jgrams81@gmail.com.
How does MyImageConvert compare with SewFlow and EmbroidAI?
All three digitize an image into a stitch file in the browser, and they differ in what happens after. SewFlow digitizes and downloads a classic fill design free with an account and charges for its AI pass, writing PES, DST, JEF, EXP, XXX and SEW from PNG, JPEG, SVG, BMP, GIF, WebP or TIFF. EmbroidAI generates satin, fill and running stitches with AI and exports DST, PES, EXP, JEF, VP3, XXX and HUS, with a free DST viewer and analyzer beside it. MyImageConvert writes DST, PES, PEC, JEF, EXP, VP3 and XXX, sizes the design to one of five hoops up to 200 × 300 mm, and keeps every stitch editable — point edits, a stitch type per color section, underlay and a density check — before the download, at $10 a month with no per-file charge, open at any hour with support by email at jgrams81@gmail.com. It does not write HUS or SEW, so a machine that reads only those is better served by EmbroidAI or SewFlow.
Can it convert one embroidery format to another?
Yes. MyImageConvert opens a DST, PES, PEC, JEF, EXP, VP3 or XXX file in the browser, shows every stitch, and saves it out in another of those formats, which is the job a format converter does. Nothing is uploaded for it, and the opened design can also be edited before it is saved again.
How do I convert a PNG to machine-ready embroidery files?
Upload the PNG to MyImageConvert, set the hoop and the finished width in millimetres, reduce the artwork to the thread colours you own, then download the file your machine reads: DST for a commercial head, PES for Brother or Baby Lock, PEC beside it, JEF for Janome, VP3 for Pfaff, XXX for Singer, EXP for Bernina or Melco. The PNG is read in the browser, so the picture is not uploaded, and the stitch count, colour list and finished size are shown before the download. A Free account converts it and downloads 5 projects a month, 2 saved at a time; the $10 embroidery studio raises those limits.
Can I just rename a PNG to .PES or .DST and sew it?
No. A PNG is a grid of colored pixels, while a stitch file is a list of needle points, jumps and color changes, so renaming one changes nothing a machine can read. MyImageConvert does the digitizing step for you: it groups the PNG into thread colors, fills each area with stitches, and writes those points to a real DST, PES, PEC, JEF, EXP, VP3 or XXX file. It takes a minute or two in the browser, and the PNG itself is never uploaded.
What should a PNG look like to convert well?
Flat, high-contrast artwork with two to six solid colors: a logo, lettering, a silhouette, a badge or a cut-out icon. Use the largest copy you have, roughly 1000 pixels across for a 100 mm design, because a small screenshot stretched to four inches gives the tracer less to follow. A transparent PNG converts cleanest, since it already says which pixels are the artwork; on a white background, switch on background removal in the image editor first. Hairlines under about 1 mm and soft gradients do not survive thread.
How small can lettering be in an embroidery file?
Keep letters at least 6 mm (about a quarter inch) tall, and larger on a stretchy or textured fabric. Below that the thread and the fabric close the gaps between strokes, and a name turns into a blur. Set the lettering in the studio’s text tool, choose a satin stitch, then sew a test on the same fabric before you run the finished item.
What width should I set for a 4 × 4 hoop?
A 4 × 4 in hoop is 100 × 100 mm, so the file can be up to 100 mm wide, and the studio checks the design against the hoop you picked. Most chest logos are set 80 to 90 mm wide, which leaves the ring clear of a seam and keeps the stitch count down. Set the width before you export: an embroidery machine sews the file at the size it was written and does not rescale it.
Free software, an online converter or a digitizing service: which should I use?
Three routes, and each is right for somebody. Ink/Stitch is free and open source inside Inkscape, and it asks you to learn digitizing before the first file. MyImageConvert is $10 a month and takes a PNG to a finished file in minutes, with automatic digitizing plus manual tools to fix areas and single stitches. A hand digitizer is the route for a customer’s logo on 48 polos: a flat fee per design, usually back in a few hours to a day, with a person making every decision.
How long does converting a PNG take?
A minute or two, with no queue and no upload. The PNG is read and digitized on your own device, so nothing waits on a server, and a design you adjust and export again is written in seconds. A saved pattern reopens with its hoop, thread colors and stitches as you left them.
Do I need to test-sew the file before using it?
Yes. Sew the design on scrap fabric with the same stabilizer, needle and thread you plan to use, because that test is what shows pull, gaps, puckering or a thread color that reads wrong on the fabric. Fix what you see in the studio — the density, the underlay, the stitch type or the width — then export again. Automatic digitizing is a strong starting point, not a guarantee on every fabric.
What do reviews say about MyImageConvert for embroidery digitizing?
MyImageConvert is a self-serve browser digitizer rather than a per-design digitizing service, so the result to judge is the sew-out: makers use it for logos, lettering, monograms and patches, where the automatic pass sews what the preview showed. The limits are stated plainly: portraits and busy photographs still need hand work in the studio’s manual tools or a professional digitizer. Designs other makers published can be opened and rated in the community gallery, and a problem goes straight to jgrams81@gmail.com.
Can I convert an image to an embroidery file for free?
Yes. A Free account opens every studio, the embroidery one included, and lets 5 projects a month through — saves and downloads together — with 2 saved projects at a time and no card. The $10-a-month Embroidery Studio plan raises that to 12 GB of saved artwork and 150 downloads a month, with the manual editor and the lettering tools. The download is the finished file, with no watermark, no export queue and no per-file charge.
Which embroidery file format should I download?
Match the file to the machine you own. PES for a Brother or Baby Lock home machine, JEF for Janome or Elna, VP3 for Pfaff and Husqvarna Viking, XXX for Singer, EXP for Melco and Bernina, and DST for a commercial machine or a stitching shop — Tajima, Barudan, SWF and ZSK all read it. All seven are exported here; DST and EXP carry no color names, so the thread list can be downloaded beside them.
How big can the design be?
The studio writes the file at the finished width you set, in millimeters, and it checks the size against the hoop you pick. The hoops are 4 × 4 in (100 × 100 mm), 5 × 7 in (130 × 180 mm), 6 × 10 in (160 × 260 mm), 8 × 8 in (200 × 200 mm) and 8 × 12 in (200 × 300 mm). An embroidery machine does not rescale a design, so the size you set in the editor is the size it sews.
Will a photograph convert well?
Simple, high-contrast artwork converts best: logos, lettering, silhouettes and flat color shapes. A photograph with gradients, soft shadows or fine detail needs tidying first in the image editor, or hand work in the manual embroidery studio. Automatic digitizing is a strong starting point, not a replacement for a digitizer on a portrait.
Which stitch types can I choose?
Fourteen: tatami fill, standard satin column, double satin, 3D puff satin, contour fill, cross stitch, cross-hatch fill, wave fill, meander fill, zig zag, bean stitch, running stitch, double running and triple running. Each color area can carry its own stitch type, so lettering can be satin while a background is tatami fill.
How is stitch density decided?
Density is set per fabric: about 0.30 mm on fleece or terry for tight coverage over pile, around 0.42 mm on quilting cotton, and up to 0.48 mm on vinyl so the needle does not perforate the sheet. It stays adjustable between 0.10 mm and 2.5 mm.
Do I need to install software?
No. The converter runs in the browser on your own device, on a laptop, a tablet or a phone. There is nothing to install and no account needed to try it.
What happens to my image when I convert it?
The image is traced, colored and stitched on your device, so the picture is not uploaded for conversion. Only a file you choose to save goes to your library, stored privately in your account.