
How it works
MyImageConvert is one browser tool that carries an image from the first dropped file to the file your machine reads. Below: the studios, the controls inside them, and what happens to your artwork.
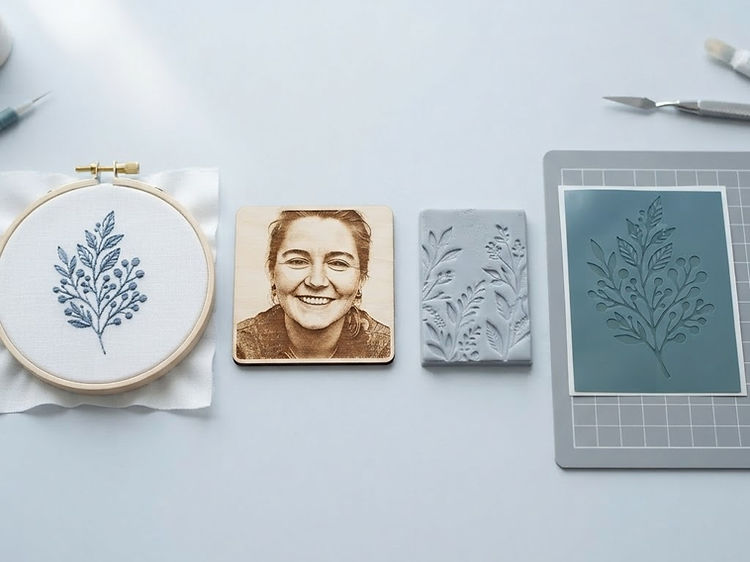
The path
From a flat image to something you can make.
Five moves, the same whichever studio you end up in.
- 01
Bring in the artwork
Drop a PNG, JPG or WEBP on the home page, or type a line of text in the hoop studio. You can also reopen a saved design, or scan a real object with the camera. A new upload lands in the image editor first, so nothing reaches a studio half-cleaned.
Image · Text · Saved file · Camera
- 02
Clean it up
Crop, paint over what you do not want, adjust brightness, contrast and saturation, drop the background, or lift a color out with the eyedropper. A tidy original is the difference between a crisp stitch-out and a muddy one.
The image editor
- 03
Pick the studio
Auto embroidery stitches the whole picture. The magic wand lets you pick areas by hand. Hoop text writes lettering. The cut studio traces vector paths. The CNC studio plans toolpaths and G-code for a router. The laser studio sets up an engraving or a burn-through cut, and the 3D studio raises the artwork into something printable.
Nine studios, one canvas
- 04
Shape the result
Set the thread colors, a stitch type per color, density, stitch length, fill angle, finished width and hoop. Then watch the needle run the design, look at it raised in 3D, and erase, splice or recolor whatever is not right.
Live, stitch by stitch
- 05
Save it, share it or download it
Keep the design in your library with folders and tags, or send a read-only link to a client. Take DST, PES, PEC, JEF, EXP, VP3 or XXX, an SVG, an STL or G-code straight to the machine.
DST · PES · PEC · JEF · EXP · VP3 · XXX · SVG · STL · G-code
The studios
Nine places to start.
Each one opens on its own canvas but shares the same library, account and export. The tag on a card is the tier that carries that studio — the pricing guide sets out the four tiers in full.
Embroidery
What the embroidery editors give you.
Auto embroidery and the magic wand studio run on the same stitch engine. This is what you can adjust.
Color layers
The artwork is split into up to eight thread colors. Each one is a layer you can see, hide, recolor, delete or drag into a new sewing order.
Twelve stitch types
Tatami fill, standard and double satin, 3D puff satin, contour fill, cross stitch, cross-hatch and wave fills, meander and zig zag. There is also a bean stitch, and single, double and triple running stitch — chosen per color.
Density, length and angle
Thread spacing runs from 0.25 to 0.8 mm, and stitch length from 1.2 to 5 mm. The fill angle swings through 180° to suit the shape and the fabric.
Five hoops, both ways up
From 4 × 4 to 8 × 12 inches, each hoop turnable to portrait. The finished width follows it, in millimeters or inches, so a design cannot grow past the frame.
Background dropped properly
Background removal only works inward from the edge of the picture, so cut-outs and details inside your artwork survive. A tolerance slider decides how much is taken.
Touch-up on the canvas
Click a section to select it. Rub stitches away with a sized eraser, or splice a section in two where the needle stands. In the magic wand studio you can merge picked areas into one block.
Watch it stitch
Play the design stitch by stitch, or step one stitch at a time. Drag the timeline, change the speed, or run the machine simulation to see the whole order of sewing.
3D view and rulers
Flip to a raised 3D rendering of the stitches, or zoom and pan across millimeter rulers to check alignment, spacing and pull before you sew.
Versions and templates
Every color edit files the arrangement it replaced, so an earlier version is one click away. Save a hoop and stitch setup as a template and drop it onto the next design.
Numbers that keep up
Stitch count, thread colors, finished size and estimated run time recalculate as you change anything. A design that is too dense to sew tells you before you load the hoop.
Cut files
Vector paths for a blade, not a needle.
The cut studio traces your artwork for vinyl cutters, lasers and card stock.
One color, one path
Up to eight colors, each traced to its own closed path, ready for a different vinyl, card or heat-transfer color.
Sized for the mat
Set the finished width up to 600 mm and the height follows the shape, so a 12 inch mat gets a 12 inch design.
Layers you can drop
Hide or recolor any layer and the path count, colors and preview follow straight away.
Edges worth cutting
Tolerance and background removal trim the stray fringes a photographed logo arrives with, leaving clean outlines.
CNC
The same artwork, cut in wood or metal.
The CNC studio turns your traced artwork into toolpaths and G-code for a router or a mill.
Machine, material and bit
Pick the machine — X-Carve, Shapeoko, a Desktop 3018 or a wide router bed — then the stock and the bit. Together they decide what a safe cut looks like: work area, cut depth, stepover and feed rate.
Three ways to cut
Outline follows every traced edge and cuts clean through. Fill each color clears the artwork out like an inlay pocket. Relief carve turns the shading of the picture into depth.
Toolpaths you can check
Every toolpath is listed with its moves, depth, line count and estimated run time, so you can read the job before the machine does.
Carve it on the real stock
Play the carve against the material you chose: oak grain, brushed aluminum, glossy acrylic. Watch the bit clear the design at its true width and depth.
G-code out
Download a .nc file in millimeters with absolute moves, the spindle speed and a safe retract between paths, ready for any GRBL sender.
Jobs stay in the library
A saved CNC job keeps its toolpaths and settings, so it reopens, tags and files alongside your other work. The G-code can be exported again from Saved files.
Laser
Burn a picture, cut an outline, on flat or curved stock.
The laser studio writes its own G-code, because a beam is not a bit. It sets power per tone, a line interval and a focus height that follows the blank.
Engrave, cut or both
One job can burn a raster engraving and then cut its outline. Raster scan runs carry a power per tone, vector paths carry their own power and speed, and each side gets its own pass count.
The head you actually own
A 10 W or 20 W diode on an open frame, or a 60 W CO2 in a cabinet. A rotary chuck holds cylinders, and a drag blade cuts with no beam at all. The controls and the safety notes swap with the head, so a blade is never offered a power setting.
Tone, interval and angle
Threshold gives hard edges, grayscale varies the power with the picture, and dither dots the midtones. Line interval sets how close the scan runs sit, and the angle swings through 180° to work across the grain.
Curved and uneven blanks
Mugs, spoons, domes and warped planks get a height map: a probe grid you can nudge point by point to what you measured. Every burn run lifts or drops Z to match, so the focus holds across the surface.
Vector work worth keeping
Add shapes, trace the artwork into outlines, offset, array, join, subtract or intersect, and drag individual nodes. The same paths can be cut by the head or exported as an SVG.
G-code out, jobs kept
Download G-code in millimeters with the power, feed and Z for every run, or the SVG of the vector layer. A saved laser job keeps its surface map, paths and settings, and reopens from Saved files.
3D printing
From artwork, or from the room, to a mesh.
Two studios make printable models: one from your design, one from the camera.
Relief or silhouette
Raise an image or a line of text into a relief on a flat base, or cut its outline into a silhouette. Height, base thickness, detail and smoothing are all yours to set.
Mesh tools
Scale, rotate, mirror and nudge the model, or cut it on a plane and keep one side. Hollow it with a wall thickness, add drain holes for resin, or repair the mesh and rebuild its normals.
Watertight check
An edge check reports whether the model is closed, so you know it will slice cleanly before you send it to the printer.
AR preview
Place the model in the room through the phone camera before committing to a print. AR needs Chrome on an Android phone; elsewhere the 3D preview does the job.
Camera scan
A depth scan measures real distance from every frame and fuses your walk-around into one solid body. On phones without a depth camera, a silhouette scan carves the object out of ordinary photos.
STL out
Download binary or ASCII STL, sized in millimeters, straight into Cura, PrusaSlicer, Bambu Studio or whatever your printer uses.
Your work
Everything you keep, keep tidy.
Saving is optional. When you do, this is what you get.
One library, mixed folders
Embroidery patterns, cut files, 3D files and CNC jobs live together. A folder can hold any mix, so a project folder keeps everything for one job in one place.
Tags, search and sort
Tag any saved file however you work, filter the whole library by tag, search by name, and sort by newest, recently modified or name. Rename, move and delete anything from the library.
Edited images kept
The image editor saves your edits to an image library inside the studio, ready to reopen or send to another studio without starting over.
Read-only share links
Send a link that plays the stitch-out with the stitch count, colors and run time, plus a note. Whoever opens it needs an account, cannot change anything, and you can update or stop the link whenever you like.
Defaults that stick
Preferences carry your hoop, width, density, stitch length and fill angle into every new design. Saved templates cover the setups you use again and again.
Your own fonts
Upload a .ttf, .otf, .woff or .woff2 file in the hoop text studio and it joins the font list for your account, stored privately.
Privacy
Your artwork stays on your device.
Unless you save it, nothing is stored anywhere.
Reading the image, splitting the colors, planning the stitches and writing the file all happen in the browser. Converting needs no upload, and closing the tab leaves nothing behind.
Saving is a choice: a saved design stores the artwork and its settings in your account so you can reopen it. Fonts you upload are stored privately and only ever load into your own studio. Scans are built on the phone that took them.
No account is needed to convert a design. Signing in is what makes the library, tags, sharing and font uploads possible. It is also where your tier lives: the studios it carries, the artwork you can keep and the downloads you can spend each month.